You can now use CNAPS Studio from ChatGPT. Connect your account, describe what you want to make, and ChatGPT can set up and run a workflow in Studio. When you want a change, ask for it in the same conversation.
We tried it with a pet photo. The first request was for an astronaut portrait. The next was for a transparent PNG. When background removal cut off the cat’s tail, a short follow-up led to a revised workflow and a cutout that included it.
Here’s how to connect your account and try it yourself.
Connect CNAPS Studio to ChatGPT
You’ll need a ChatGPT account and a CNAPS Studio account. The connection uses MCP, which lets ChatGPT work with tools in CNAPS Studio.
1. Add the connection
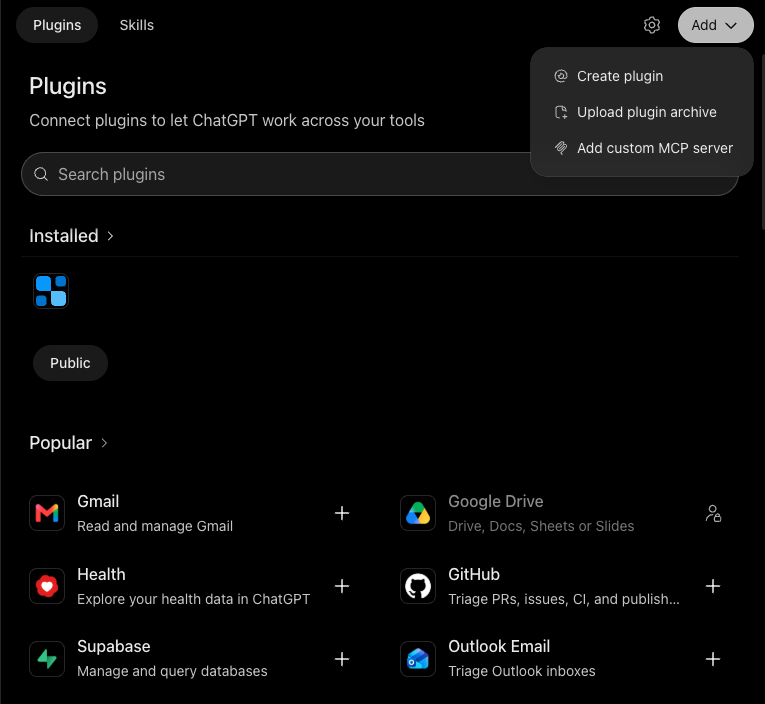
In ChatGPT, go to Settings → Plugins → Browse directory. Open the Add menu and choose Add custom MCP server.
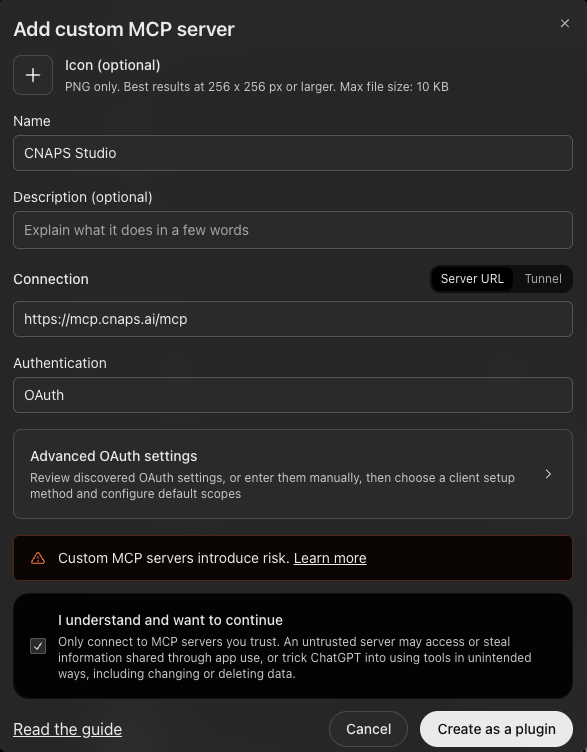
Enter:
- Name: CNAPS Studio
- Server URL: https://mcp.cnaps.ai/mcp
- Authentication: OAuth
Review the notice, check the confirmation box if you agree, and select Create as a plugin.
2. Authorize your account
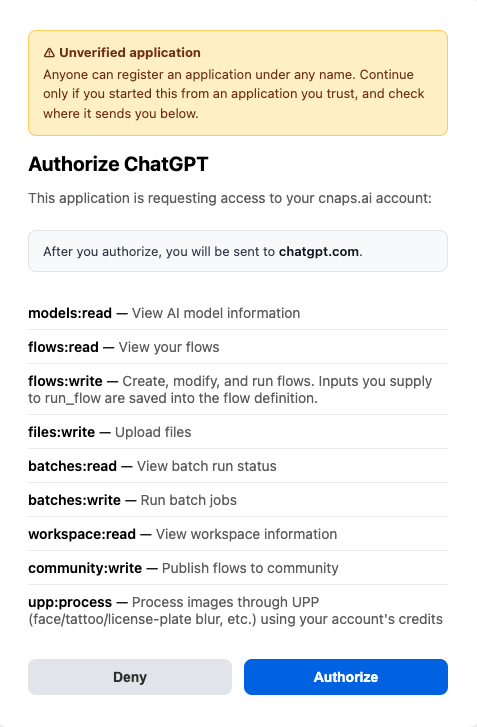
Select Connect CNAPS Studio and sign in to CNAPS if prompted. Review the permissions on the authorization screen, then select Authorize to connect your account.
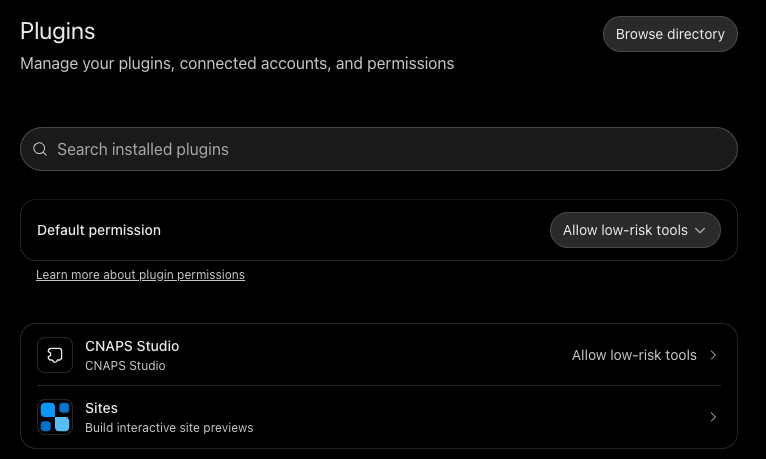
CNAPS Studio will appear in your installed plugins. These steps follow the interface shown in our screenshots; you can also refer to the connection guide.
Make your first request
Start with what you want to make. For our test, we asked:
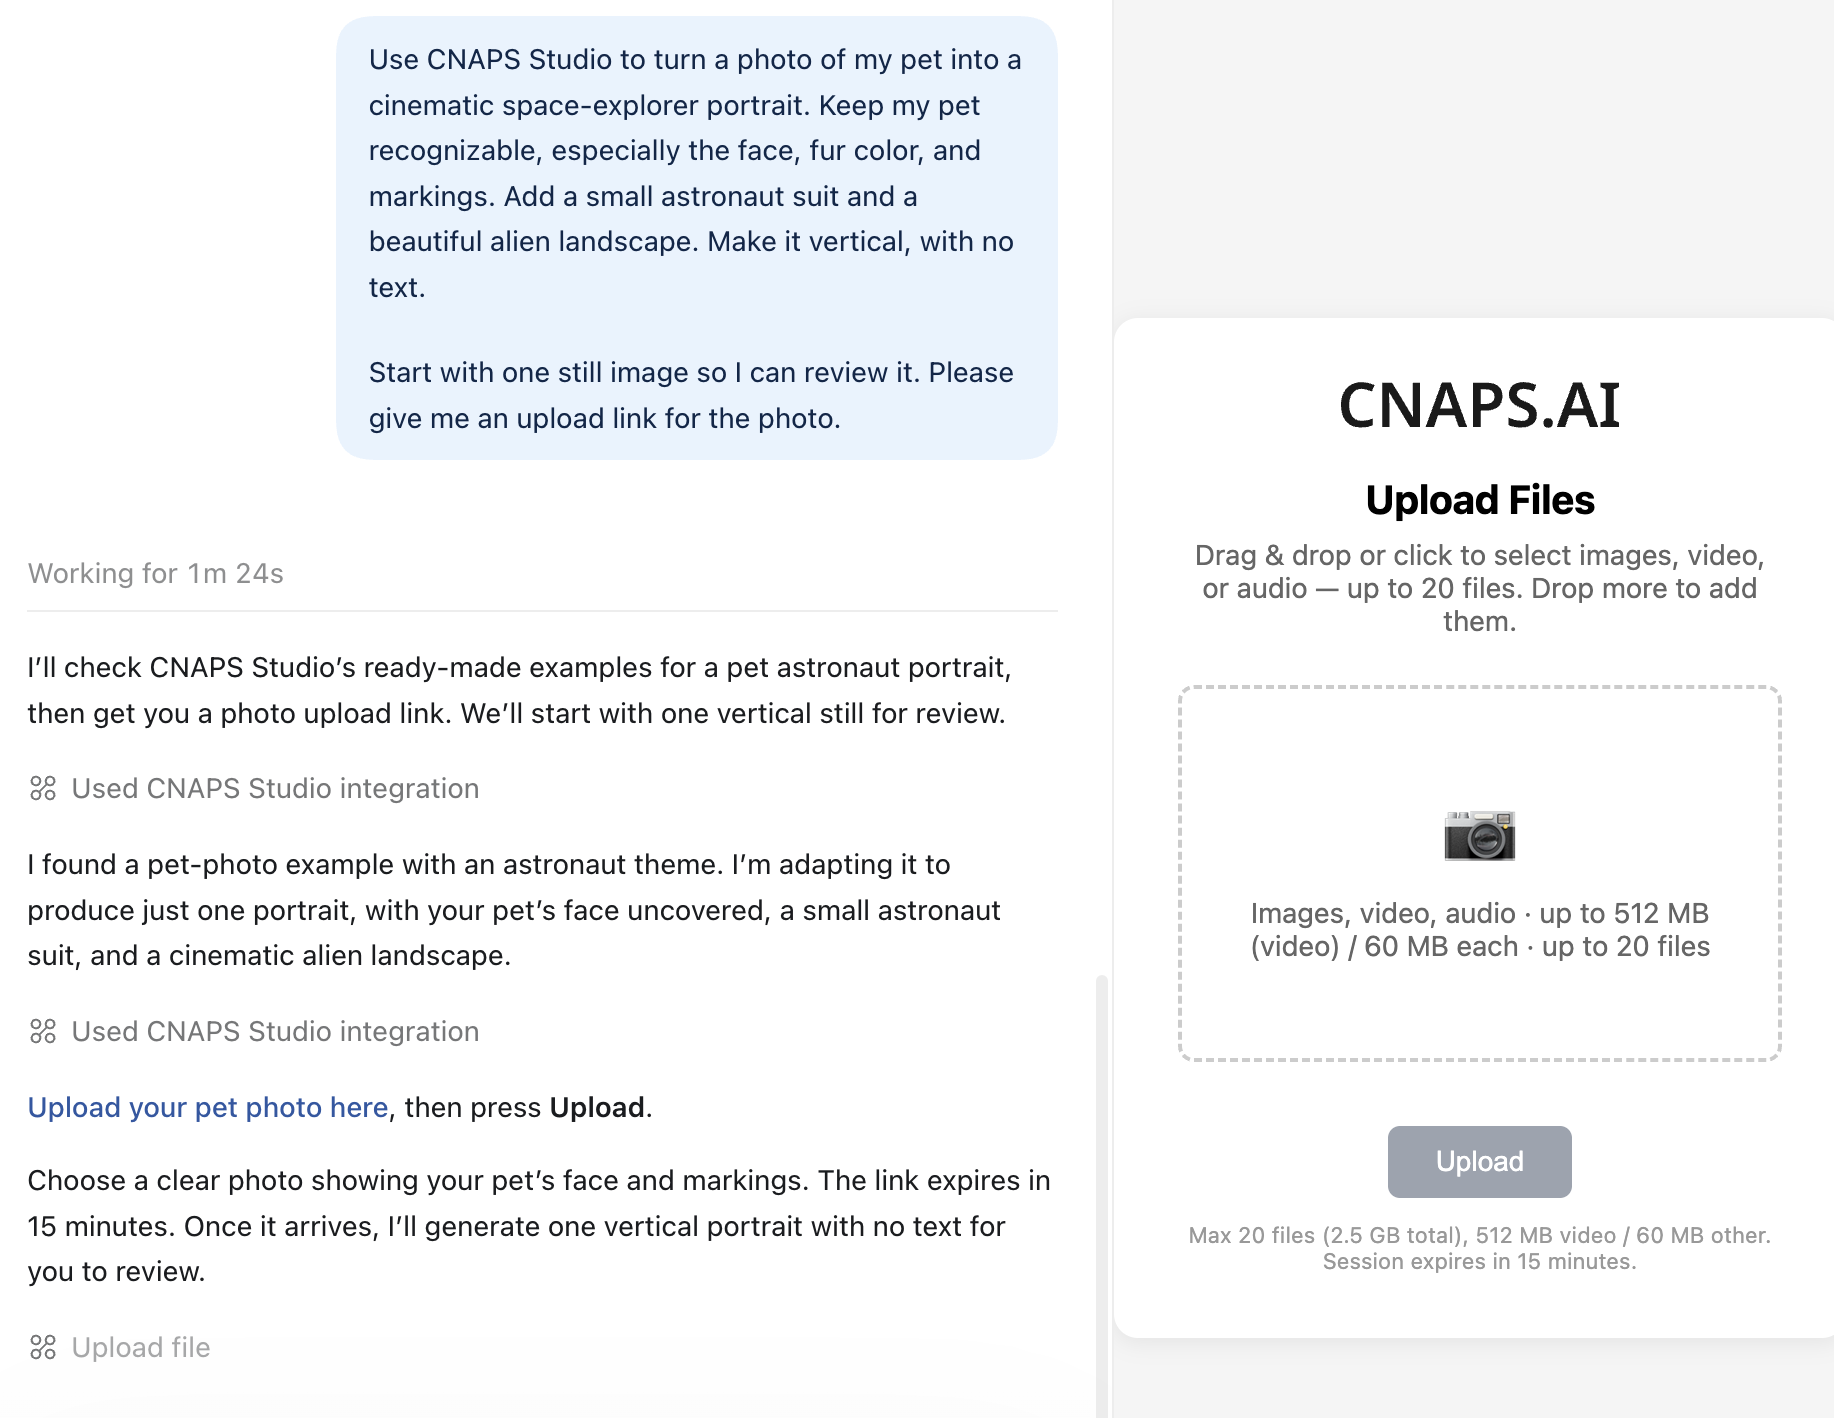
Use CNAPS Studio to turn a photo of my pet into a cinematic space-explorer portrait. Keep my pet recognizable, especially the face, fur color, and markings. Add a small astronaut suit and a beautiful alien landscape. Make it vertical, with no text.
Start with one still image so I can review it. Please give me an upload link for the photo.
ChatGPT found a pet-photo example in CNAPS Studio and adapted it to produce one portrait. It then provided a link to upload the reference photo.
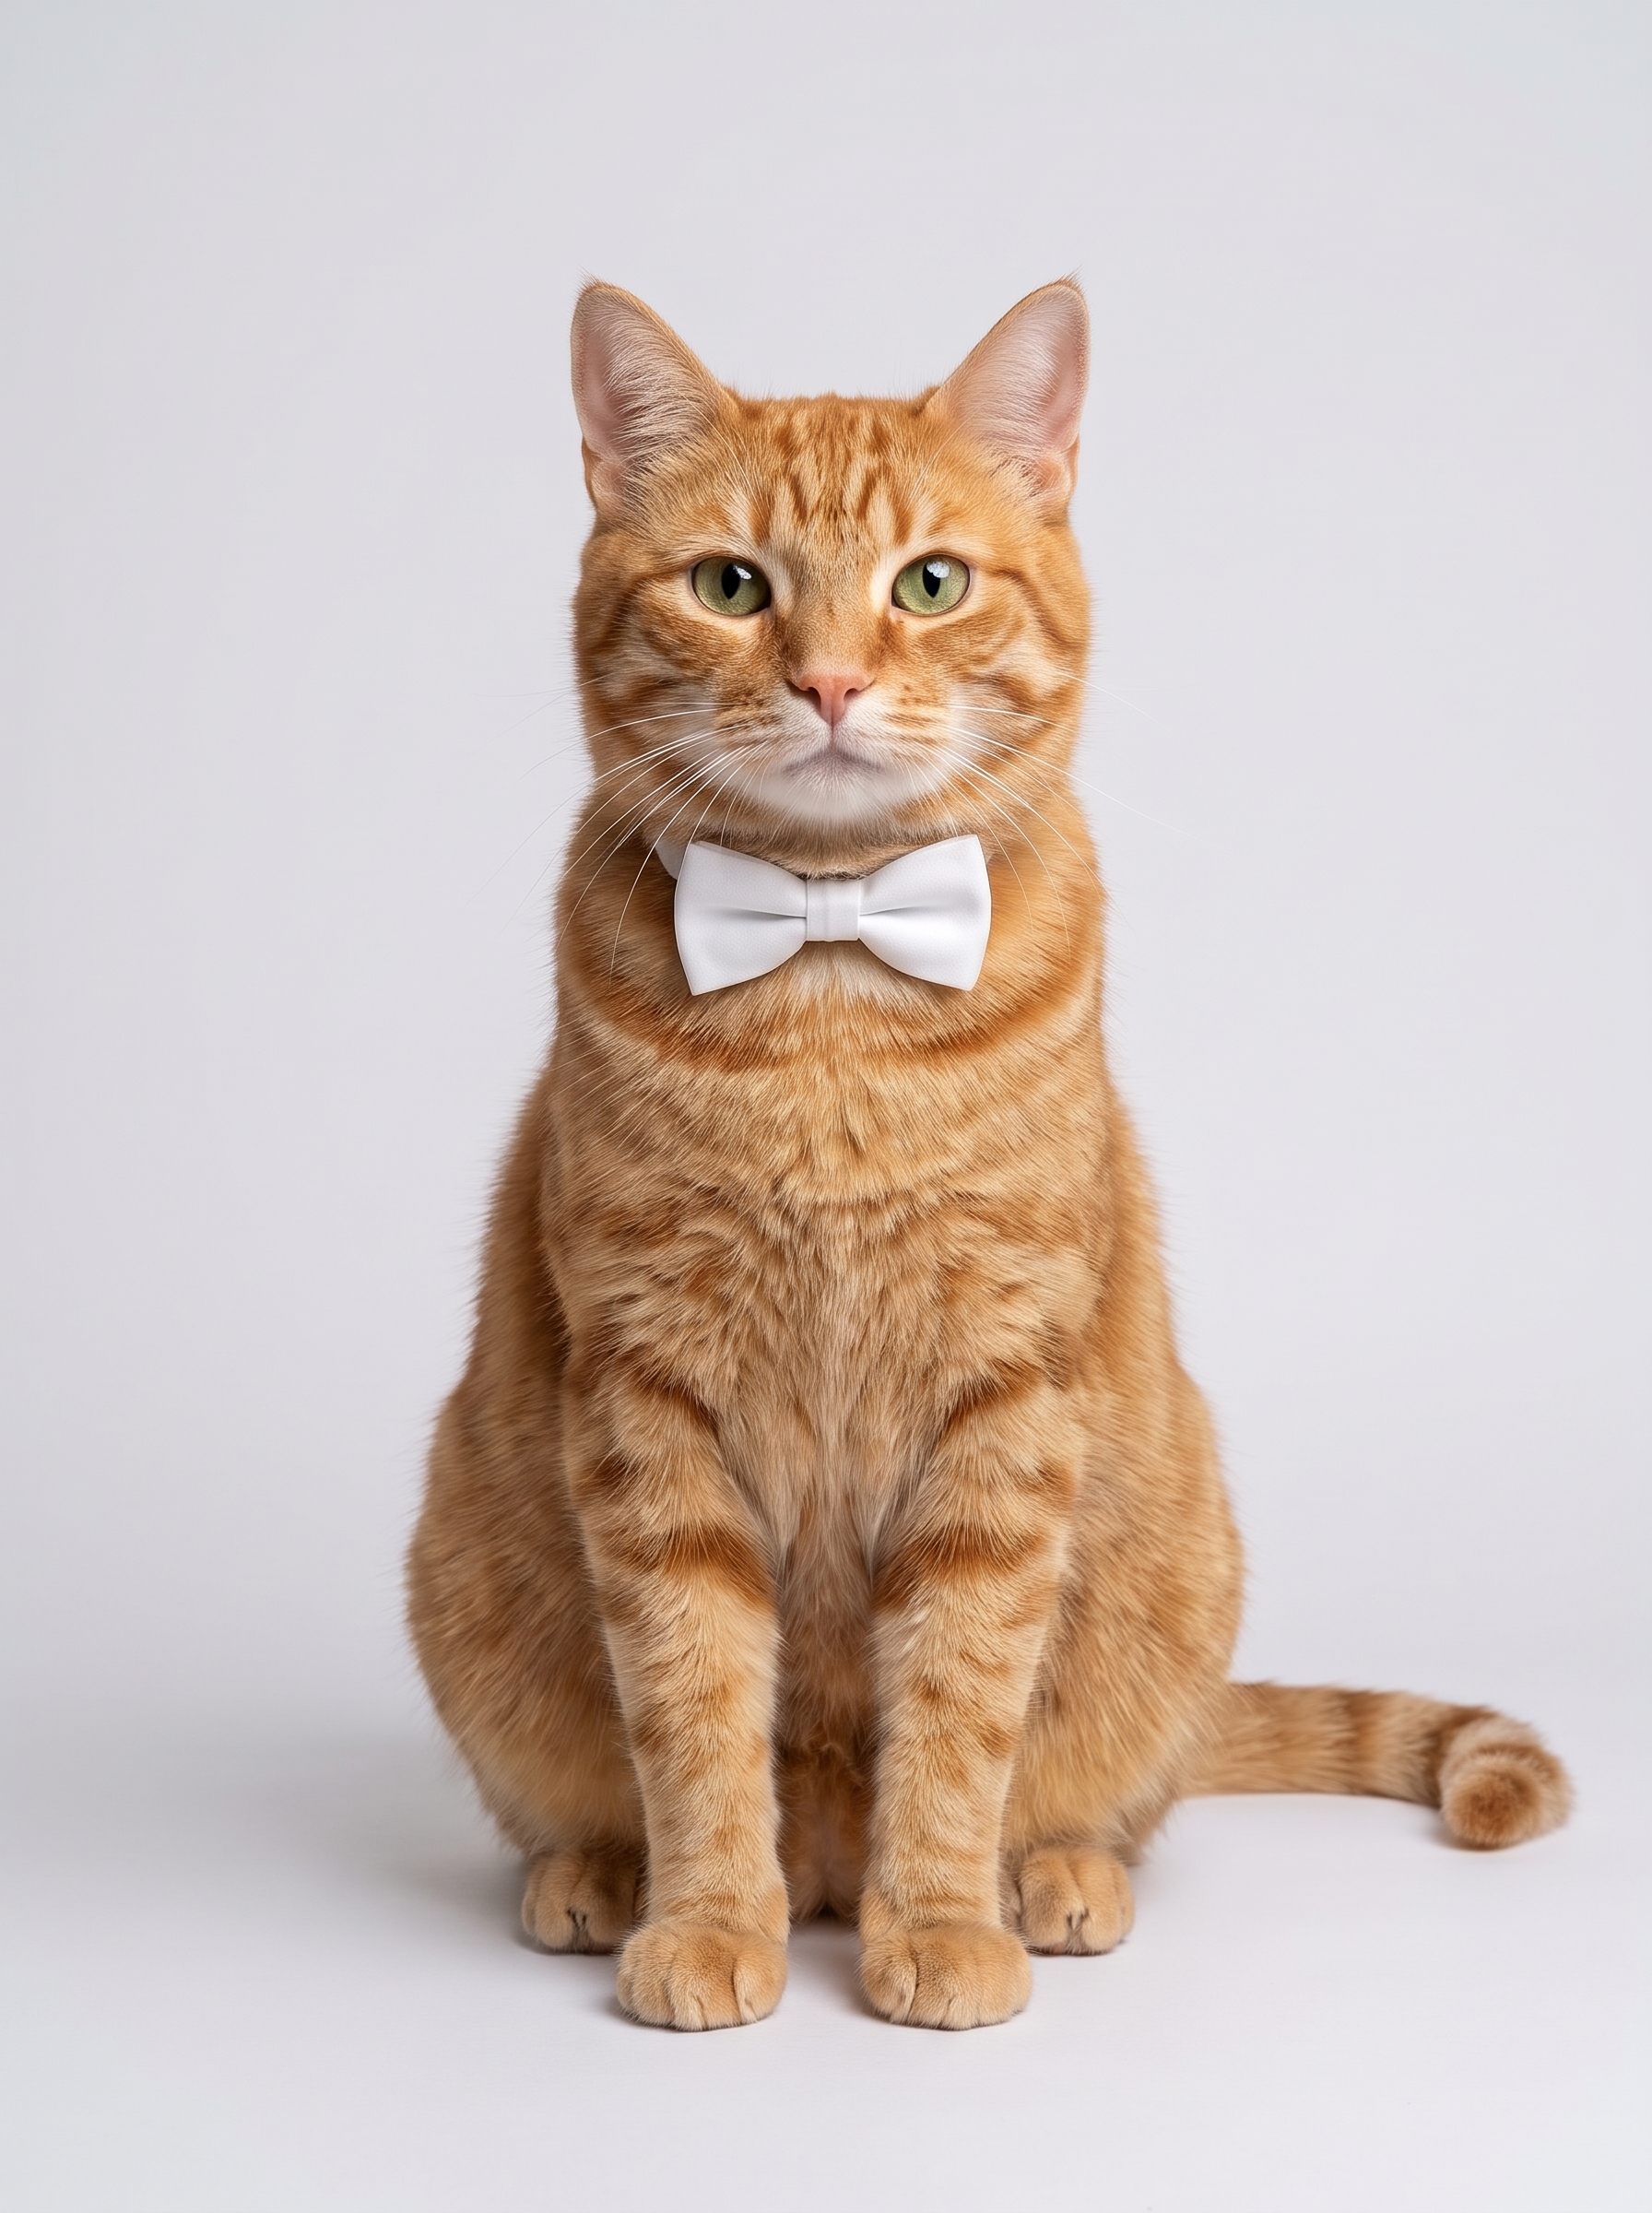
Open the link, choose your photo, and press Upload. In this example, we used the CNAPS upload panel opened from the conversation.
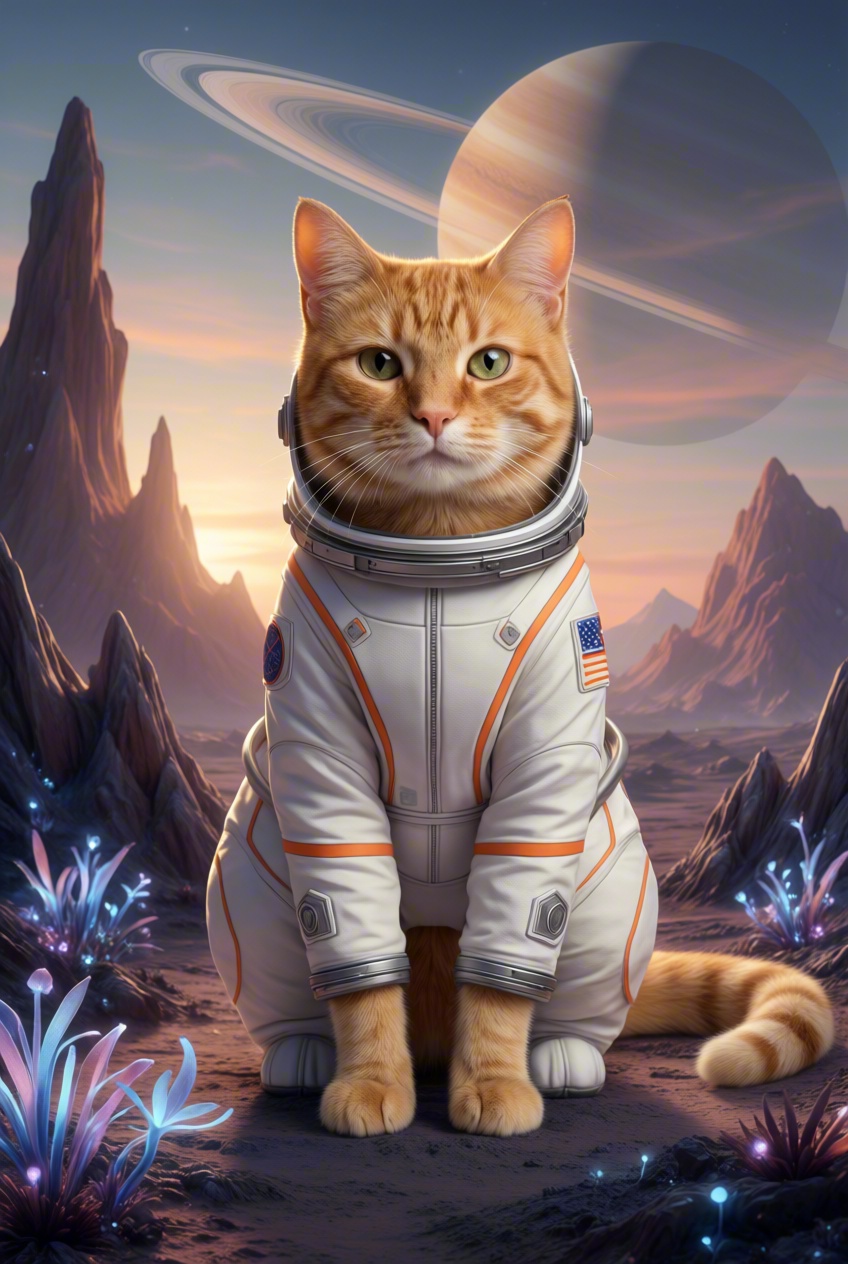
The result puts the cat in an astronaut suit beneath a ringed planet. Before moving on, check the details that matter to you: the face, markings, paws, and tail.
You can open the workflow in CNAPS Studio to see how the image was made and download the result.
Ask for another version
We then asked for a transparent PNG. If you're following along, you can use:
Remove the background from this astronaut portrait and give me a transparent PNG. Keep the whole cat, including the tail and astronaut suit.
That gives you a version you can place on another background or use in a design.
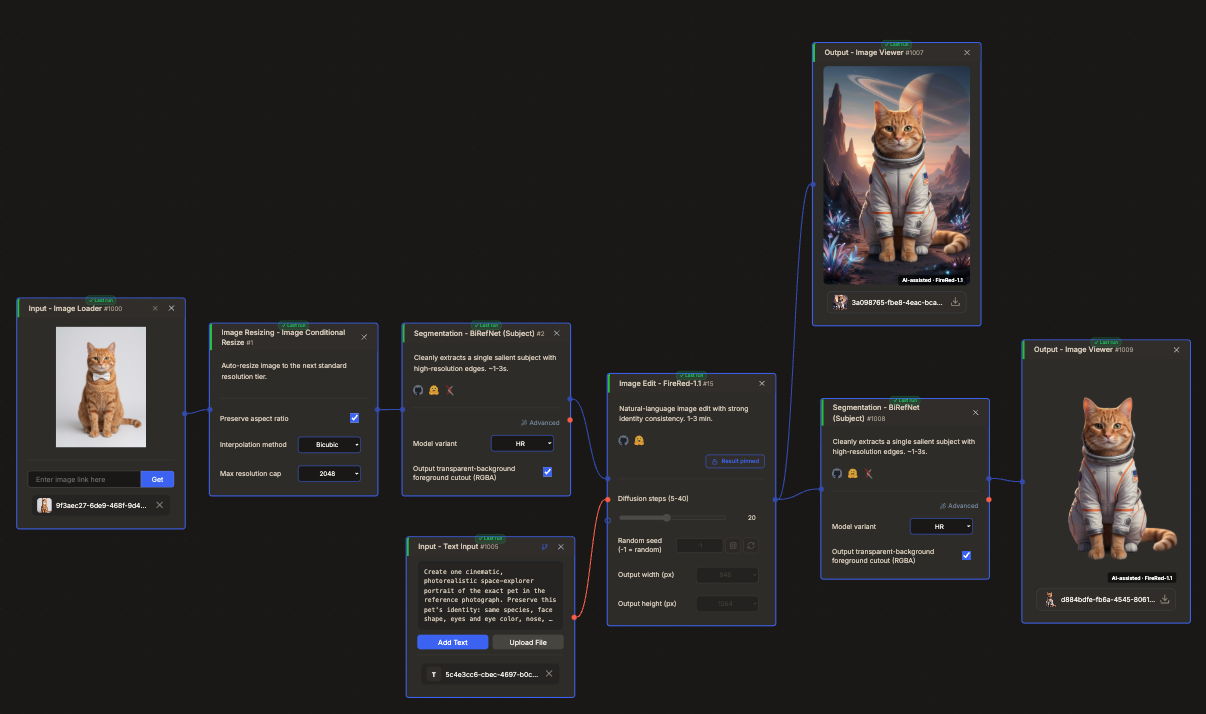
In our test, the first cutout missed the tail. We just replied "hey, you didn't keep the tail" and ChatGPT changed the workflow and ran it again. The new PNG had the tail.
A few things to know
The work runs in CNAPS Studio. This example uses the CNAPS integration, rather than ChatGPT’s built-in image generator. ChatGPT sends the requests; Studio runs the workflow.
Review each result. Generated images and background removal can miss details. A follow-up request gives you a way to address them, but you should still inspect the output.
Use the upload link provided in the conversation. That’s how we supplied the reference photo in this walkthrough.
Try it with your own idea
Once CNAPS Studio is connected, make a request that starts with “Use CNAPS Studio to…” and describe the result you want. Review the first output, then ask for the next change.
Connect CNAPS Studio to ChatGPT →
Prefer Claude? See how to use CNAPS Studio with Claude.
